User Guide
Follow the instructions below to setup and start using the MEGA History App.
NOTE: Make sure you have gone through the Installation Guide prior to beginning SETUP.
SETUP
There are 2 ways to configure and set up the MEGA History App.
First, you can install the app directly in a production environment and deploy your configuration using the MEGA History Admin App.
Second, if you have a lower environment you want to test your configuration in first and deploy via change sets or another deployment option(ANT, SFDX, etc…), you can install MEGA History in the lower environment and deploy the triggers and metadata record configuration all at once.
The following instructions pertain to either way you want to deploy your configuration, only the environment that you complete them in will be different.
1. Open the MEGA History Admin App in the Salesforce App Launcher.

2. Follow the on-screen guidance to setup and configure the MEGA History App in your Salesforce environment.
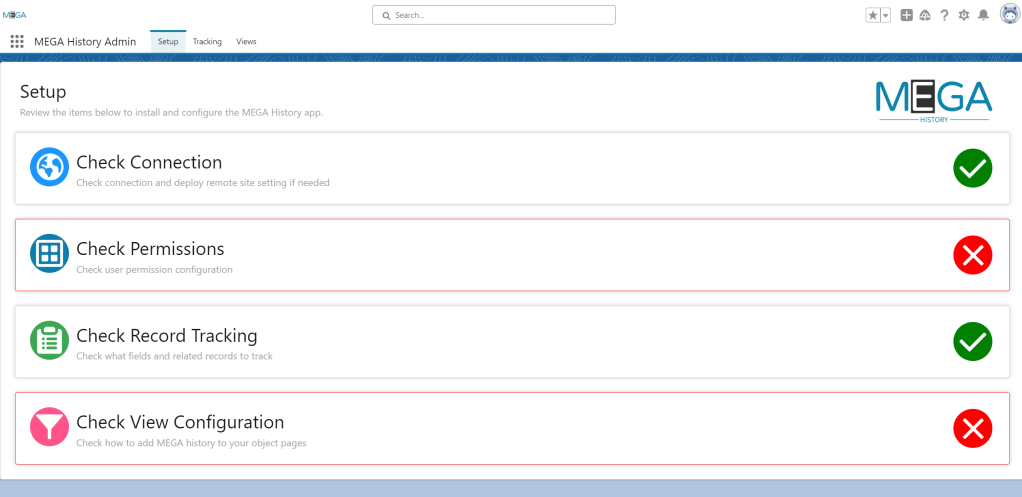
You can click on each section highlighted in red for more information as you configure how you want to use MEGA History.
Tracking Configuration
NOTE: For best results, please have your Standard Field History tracking configured prior to MEGA History tracking.
In the MEGA History Admin app, Navigate to the Tracking Tab.
Select the Track New Object button to begin configuring which objects and fields you want to track. Select which object you want to track from the list of avaiable options.
From here, you can configure if you want to track records being created, deleted, and undeleted by using the parent reference to see these changes.
If tracking deleted records, you have the ability to select additional fields in order to identify records besides for the name field which is tracked by default.
To track additional fields, select fields from the list of available fields. Locked fields already in the selected list represent fields that are already being tracked by standard field history tracking. If you’d like to remove those fields, please refer to the standard field history tracking in Salesforce Setup.
Once you save your configuration, you will need to deploy them to your organization for them to take effect. You will see the Deploy button on the Tracking screen enabled which will bring up the Items to Deploy dialogue.
Deploy each configuration item as prompted. If you are configuring in a sandbox prior to production deployment, you can now find these metadata records and triggers in the available components for Change Sets and retrievable via the metadata API for addition to your ANT scripts/repositories.
Once you have deployed all items, you will see confirmation on the Tracking screen that each item is deployed.
To make changes to your configuration, select the Edit button for the object you would like to change and then deploy the changes following the previous step.
To delete a configuration altogether, click the trash can button next to the configuration you would like to delete and confirm your selection. Once confirmed, you will still need to deploy your changes just like when the configuration was added and/or edited. Click the enabled Deploy button and you will see the Items to Deploy dialogue again. Deploy each configuration item as prompted in order to remove them from your organization.
Your configuration will be removed from the Tracking Screen.
Views Configuration
In the MEGA History Admin app, Navigate to the Views Tab for instructions on how to add the MEGA History Related List to your Lightning Record Pages.

Once you’ve added the MEGA History Related List to your Lightning Record Page, there are a few options that you can use to determine how the list should appear on the selected Lightning Record Page.
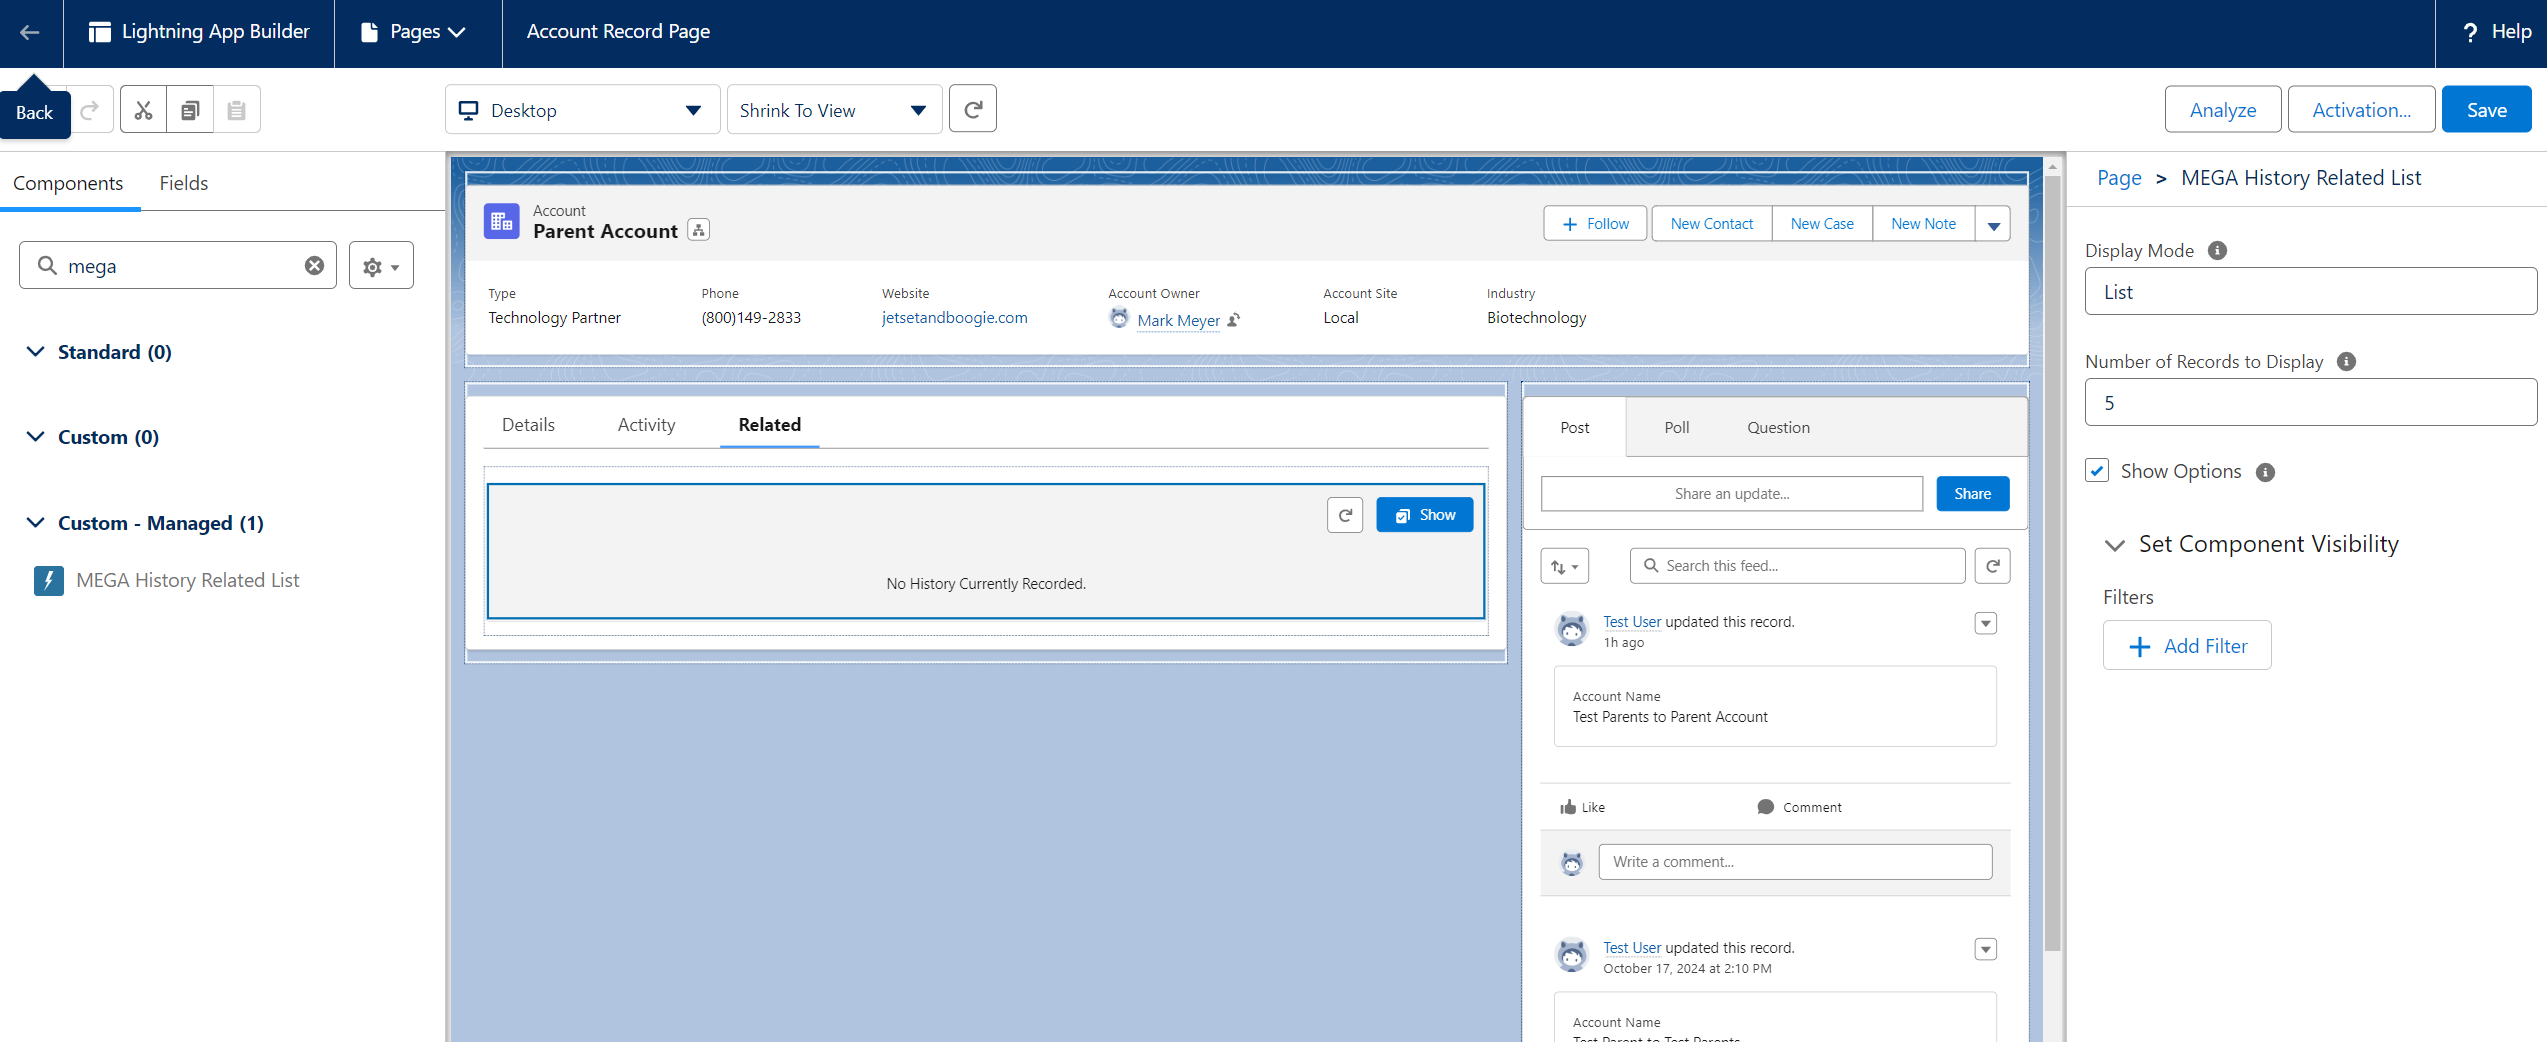
Display Mode: Tile or List. List is the default and shows the record history as a standard related list. Tile allows you to display the record history in individual tiles per record. Tile is often preferred when placing the component in a 1:3 horizontally compact position.
Number of Records to Display: Defaulted to 5. Determines how many records display by default on the initial related list. The “View All” button will open a new screen to display all records.
Show Options: Defaulted to true. Turn off this option if you do not want to give the users the Show(Options) button on the related list.
MEGA History Related List
The MEGA History Related List will dynamically combine custom history tracking with standard field history by default.
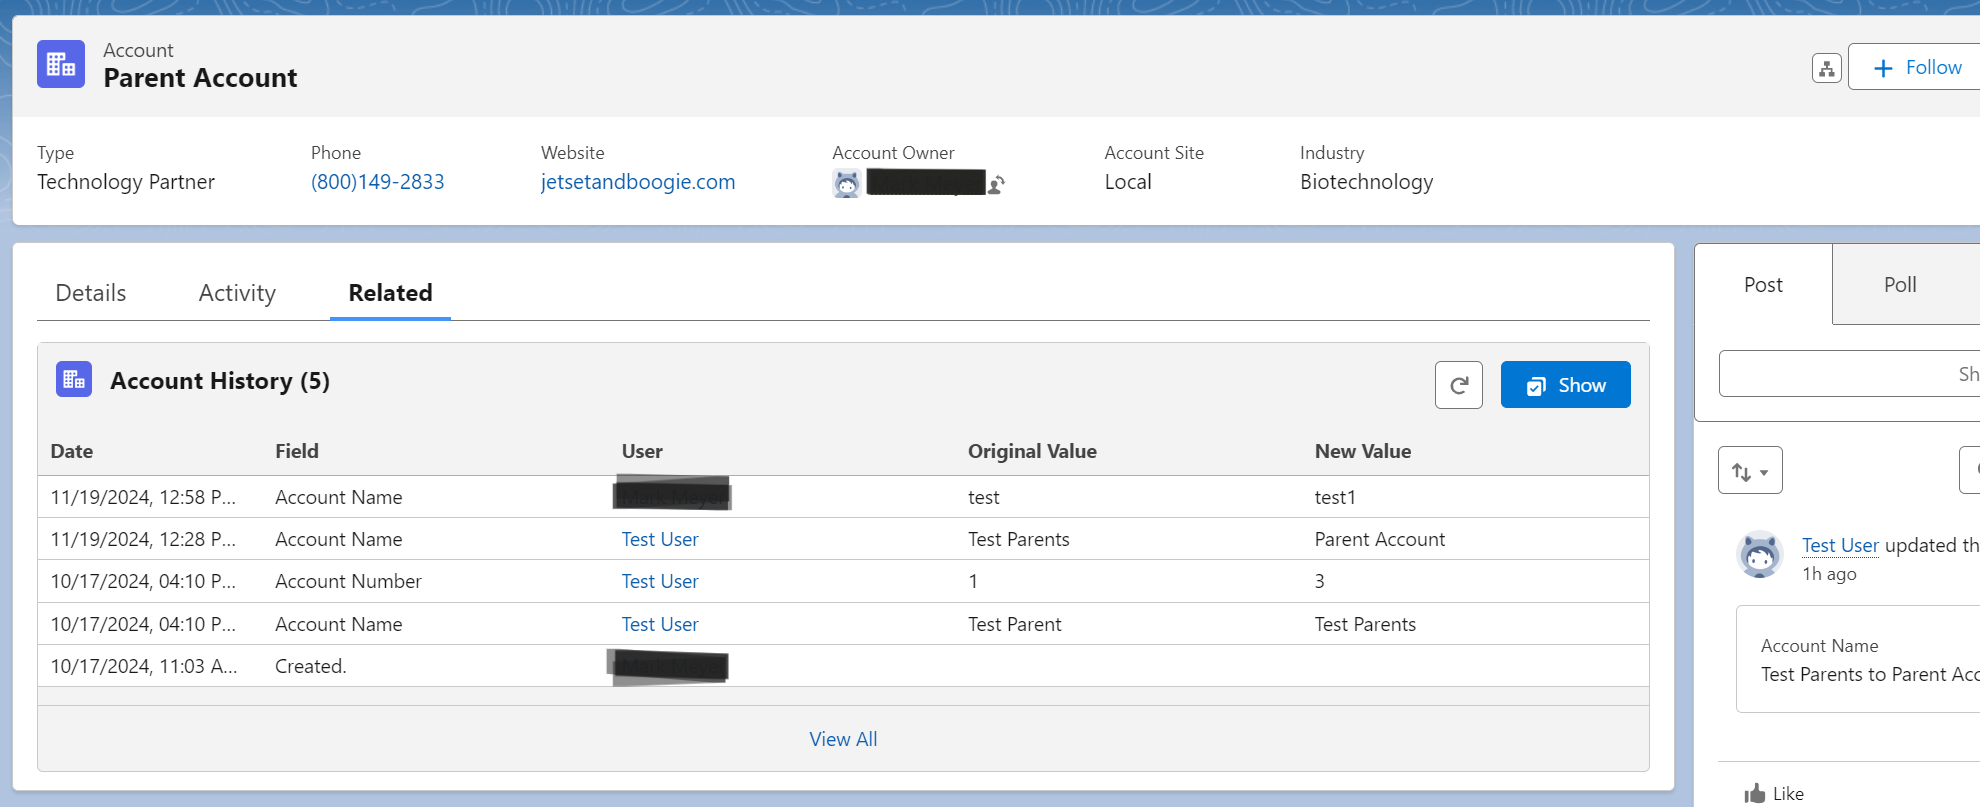
Click the Show button to see additional Options available for displaying history.
Available Options include:
Hide Standard History which removes standard field history tracking records from the record history. This option allows certain fields to be emphasized when there are large amounts of fields being tracked.
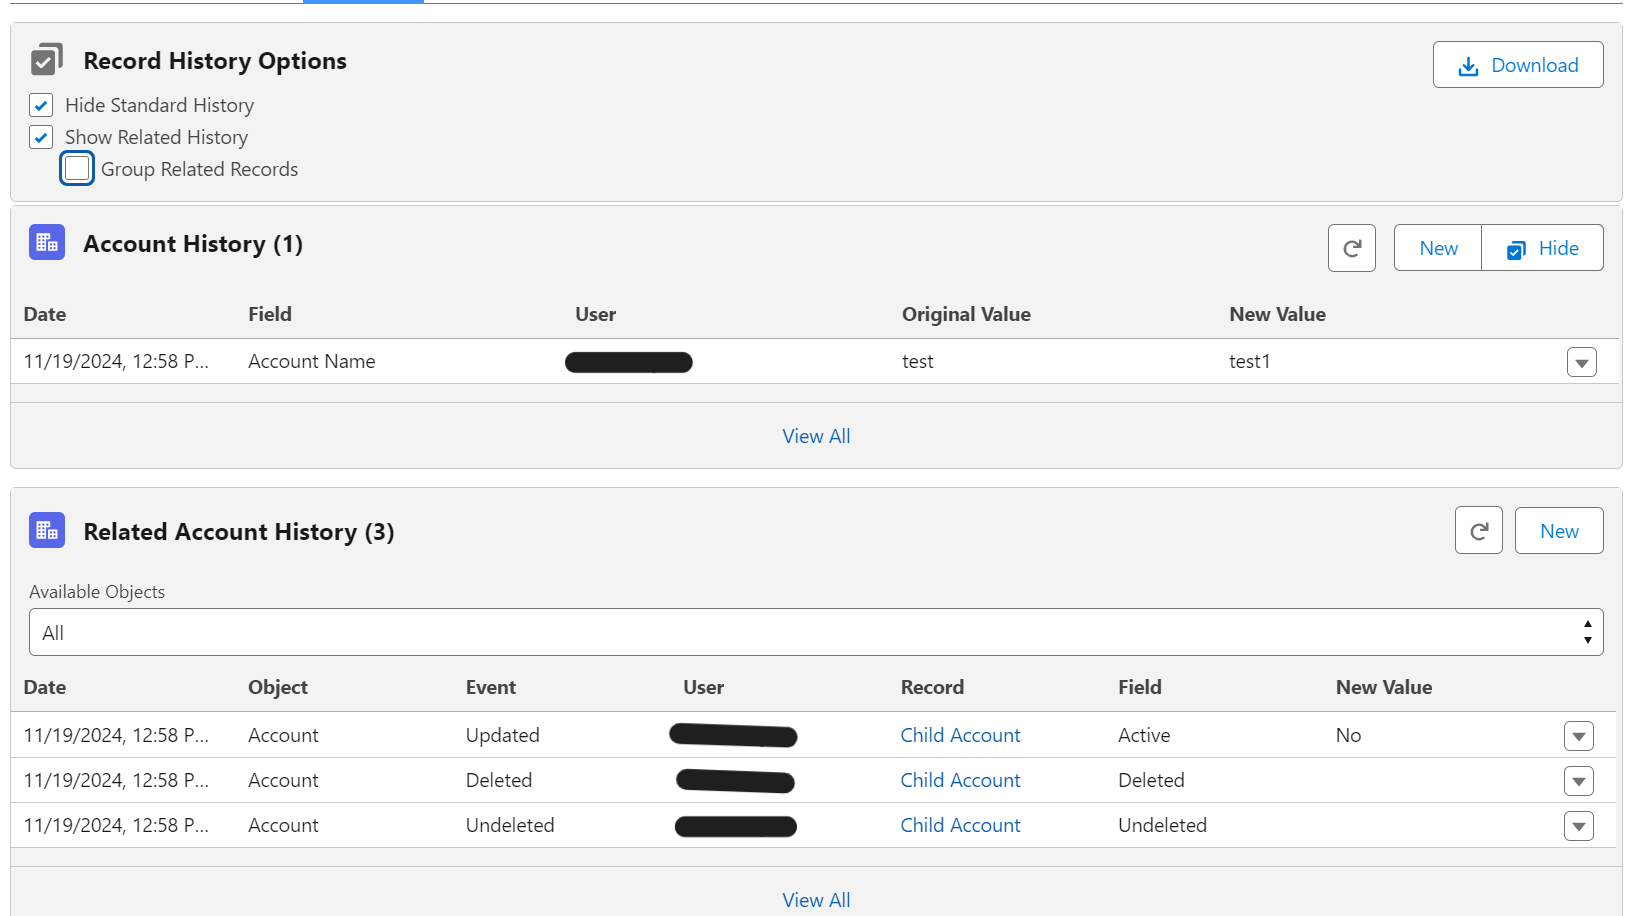
Show Related History renders any child records for this object that have been configured in the Tracking Screen in the MEGA History Admin app. By default, the related record history will show in chronological order across all records.
Group Related Records will show a tree structure of relate list organized by object and then record so you can see a timeline per related record. Additionally, you can filter this list by object if there are lots of records and object available.

Download option allows you to download a combined view of the record history for any reporting needs.
To see all the record history available on a separate screen, click the View All button either on the record history panel or the related record history panel.
Editing Record History
NOTE: Standard Salesforce Field History tracking cannot be edited.
NOTE: In order to see the options to Add, Edit, and Delete custom history records, you must have the MEGA History Super Admin permission set.
To add a custom history tracking record, click the New button on the MEGA History Related List. Both the record history and related record history lists have their own “New” buttons. Make sure you are selecting the correct button for the type of record history you are adding. Follow the prompts on the New Record modal to add record history manually.
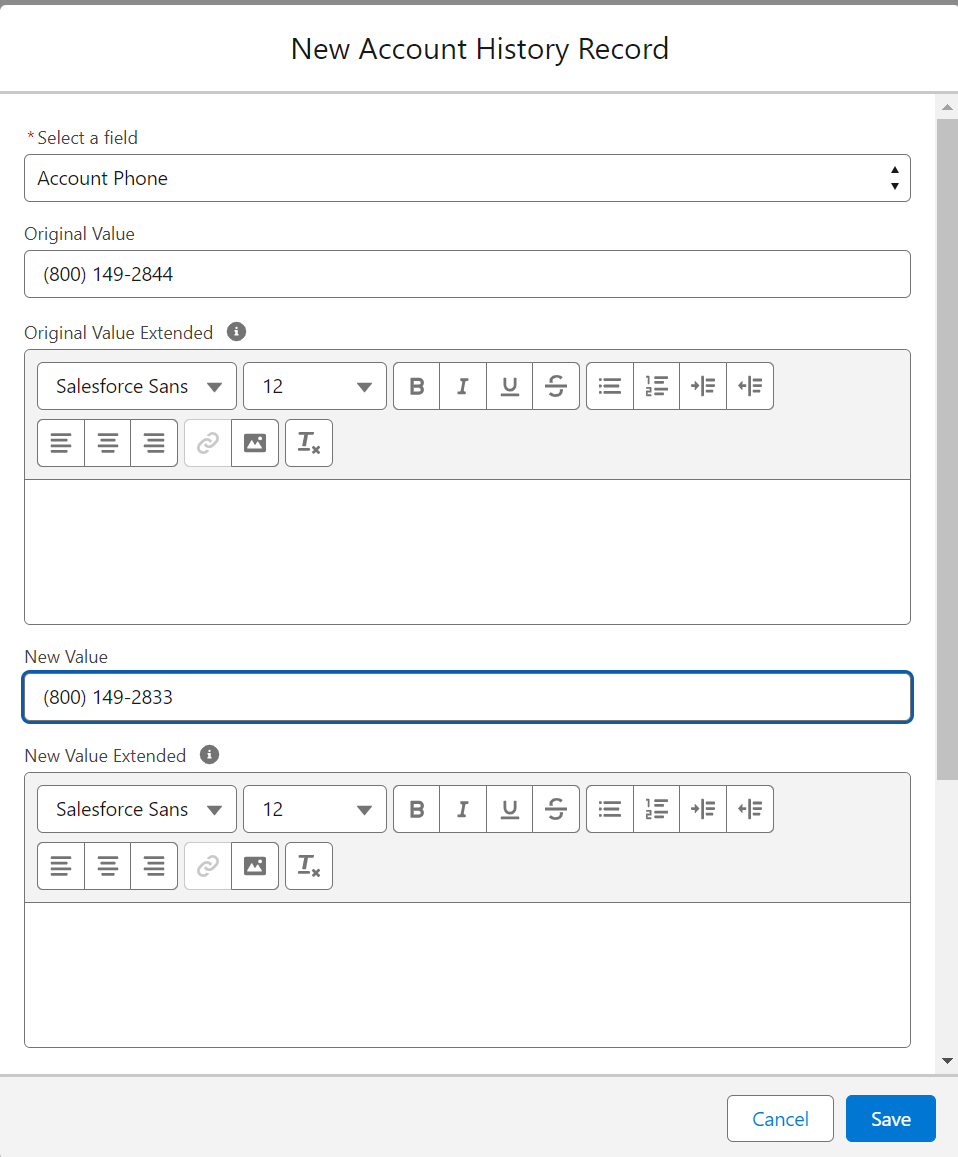
To edit or delete custom history tracking records, click the menu item down arrow on the right of the record to be edited from the history list. Standard history records will have no options because they cannot be edited or deleted.
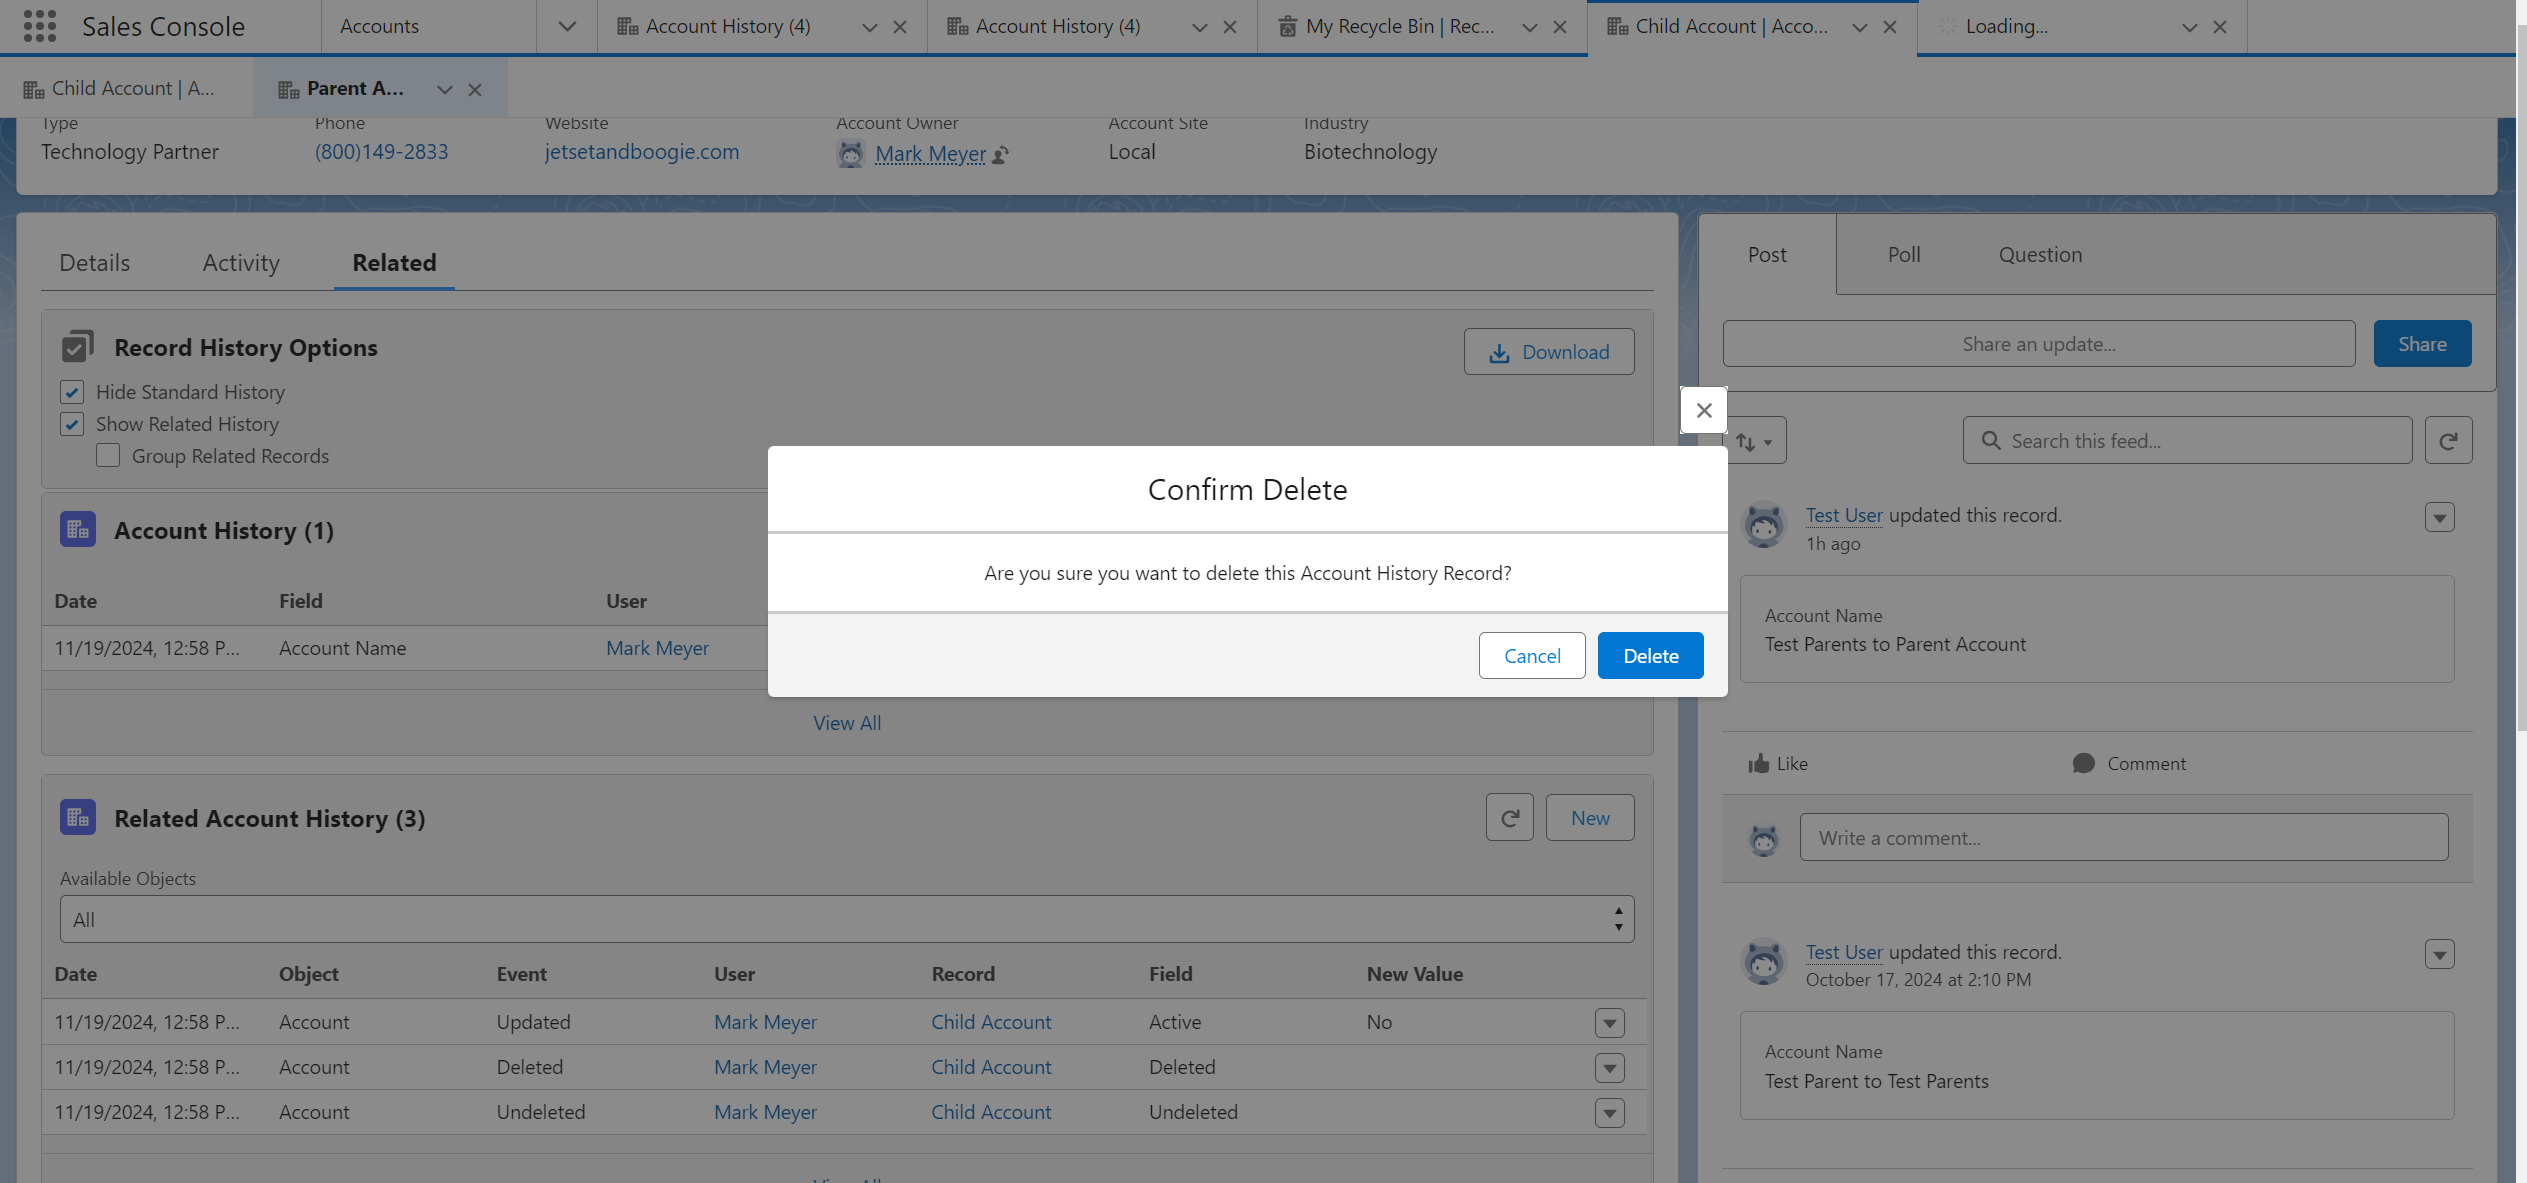
Save and confirm your changes.
Migrating/Importing Record History from an external system
An import tool is available using the newest version of the application which is not yet available on the AppExchange. Use the installation links from the Installation Guide to upgrade your package to the newest version.
Please contact support@megatoolscrm.com with any questions or if you would like to set up a support agreement.
